Last Updated on March 12, 2018 by Karen

It’s been a while since I promised to show you how to make pineapple flowers. And you’ve stuck around for this long. Forgive me? I know you would.
Aren’t these pineapple flowers gorgeous? I saw them in a food magazine once and knew I had to try to make them. Colored frosting and sprinkles are fun no doubt, but decorating your cakes and cupcakes with these flowers will give them a beautiful, natural finish. I’ve made them plenty ton of times and I still can’t get over how visually stunning they are – I only came up with such a great result when using the dehydrator (ran through quite a lot of dehydrator reviews before picked one, by the way). With an understated elegance, if you will.

Here’s how to make them:
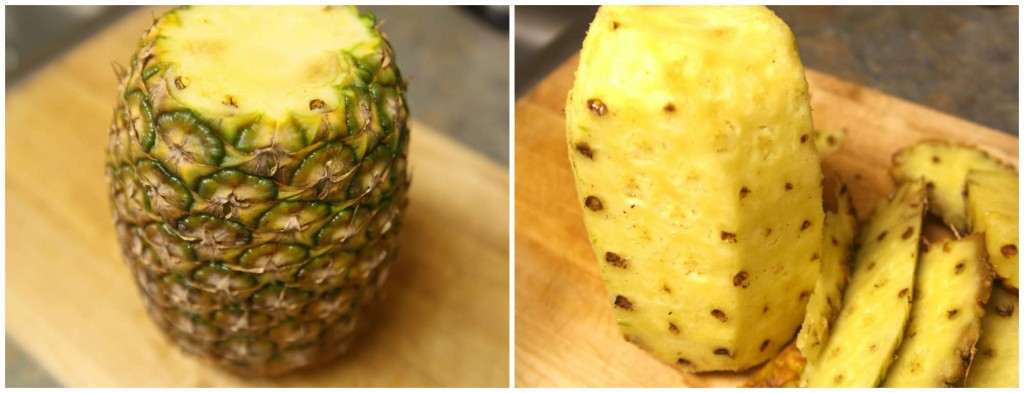
Cut off the top and bottom of the pineapple. Stand it upright and trim the sides. An under-ripe pineapple is definitely easier to handle (not as juicy and slippery), but a ripe pineapple will give these flowers a deep golden hue and a sweet, floral taste and scent. Don’t forget, they are completely edible! And very tasty, too.
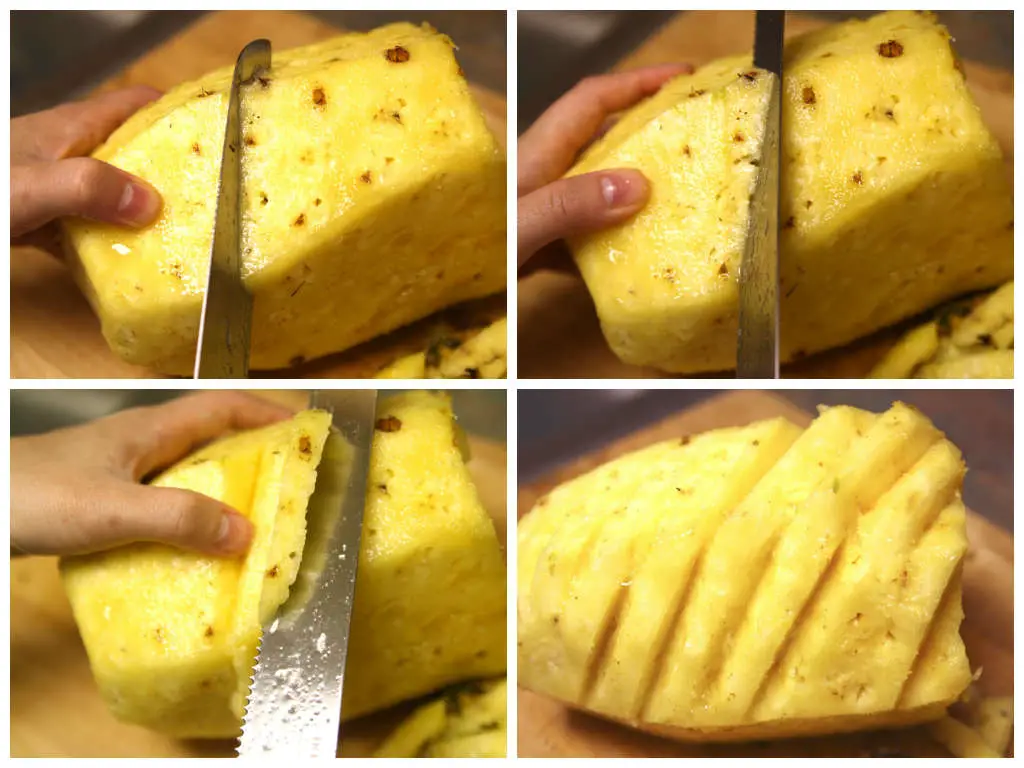
 Remove the “eyes” of the pineapple. This is the method my grandmother taught me: using a sharp knife, make two long cuts in the shape of a “v” to remove a row of “eyes” at a time.
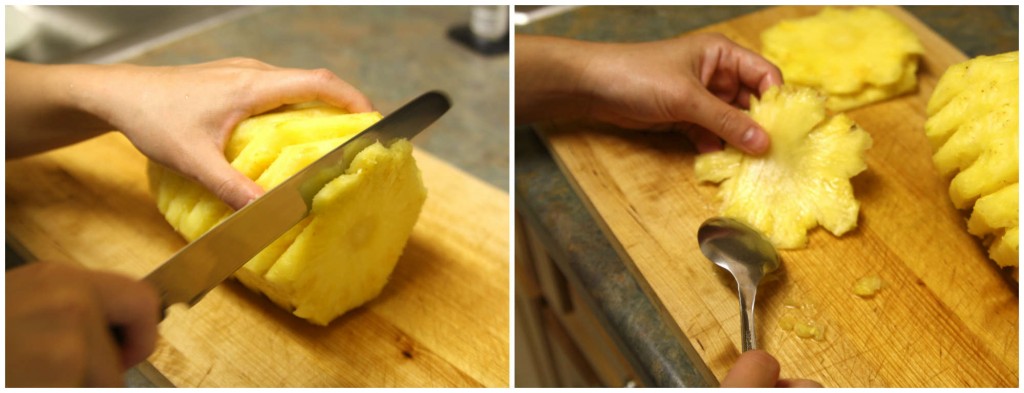
 Lay the pineapple on its side and cut crosswise into very thin slices, about 1/8″ thick. I used a serrated knife, in a slow, sawing motion in order to cut through the tough core (which is the most difficult part). The ease of cutting these slices depends on the ripeness of the pineapple; the more ripe it is, the easier it is to cut through the core. Once you have these slices ready, use a spoon to lightly scrape the edge to remove the rough, sharp edges created when you trim the sides off of the pineapple.
 Place the pineapple slices on a baking sheet lined with parchment paper or silicone mat. Bake at 250˚F until the flowers are dried. Exact baking time depends on how thin the slices are; the thicker the slices, the longer it takes. I check on them every 30 minutes (every 15 minutes as it gets closer to being done) and flip them over to the other side until they are completely dried. Remove baking sheet from the oven and fit the slices into muffin tins, carefully manipulating them to give them a cupped shape. Allow them to air dry completely.


I was just thinking about making these cupcakes the other day!
Those are beautiful. What a wonderful idea. I understand what you say about the baking time, but can you give a general idea of how long they might need to be in the oven? More than two hours? Less? Thank you!
Of course! One time I sliced them paper thin, and it took about 45 minutes. Another time they were a bit thick, so that took about 1.5 hours. You may even have a batch with both thin and thick slices, so be sure to keep an eye on them and remove some of those slices as they are done. Hope that helps!
This worked out spectacularly. Thank you!! :D
What did you put in the centers?
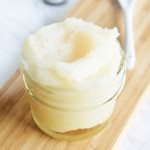
Actually I didn’t put anything in the centers. Once the pineapple core dries, it naturally creates that effect (white dots), which makes it appear like a real flower. It’s pretty neat!
Ah, ok, thanks, they’re gorgeous.
Karen,
Could you make this flowers a couple of days prior to the day needed? Thank you!
Hi Ria, you could definitely make these ahead of time! Depending on the humidity of where you’re at, the flowers might pick up some moisture in the days prior to when you need them. If you’re in a dry climate, it shouldn’t be a problem. For me, making these flowers during the summer or rainy days is a bit trickier, so what I usually do is to pre-make them a few days prior, and lay them out on the counter or in the fridge. On the day I need to use them, I just set the oven to the lowest heat setting possible, put all of the flowers on a sheet pan, and dry them out further (keep an eye on them so they don’t burn).
Thank you Karen :)
Pingback: Dinner Party | Rice & Kai
Thank you for sharing this! Lovely!
Pingback: Souper-second birthday and, of course, a healthy cake!
Thanks so much for sharing this. I used these flowers to decorate my daughter’s second birthday cake and have linked to this page from my blog post: http://souper-woman.com/2014/06/16/souper-second-birthday-and-of-course-a-healthy-cake/
They look great on the cake and cupcakes! And happy second birthday to your daughter :)
Pingback: Destination Inspired Weddings: Maui, Hawaii, U.S.A. - My Hotel Wedding