Last Updated on July 16, 2025 by Karen
Master the Instant Pot Poultry setting for perfectly cooked chicken and turkey every time! Learn step-by-step how to pressure cook whole chicken or chicken breast, plus tips for models without the preset button.
The Instant Pot has revolutionized home cooking, transforming once time-consuming meals into quick, effortless culinary triumphs. Among its many ingenious features, the “Poultry” setting stands out as a true game-changer for anyone looking to prepare tender, juicy chicken or turkey with minimal fuss. But how exactly does this preset work, and how can you leverage it for consistently perfect results?
This comprehensive guide will demystify the Poultry button on your Instant Pot, providing a deep dive into its functionality, best practices, and versatile applications, ensuring your poultry dishes are always a hit. We’ll cover everything from simple chicken breasts to a glorious whole chicken, along with tips for successful pressure cooking.
What is the Instant Pot Poultry Setting?
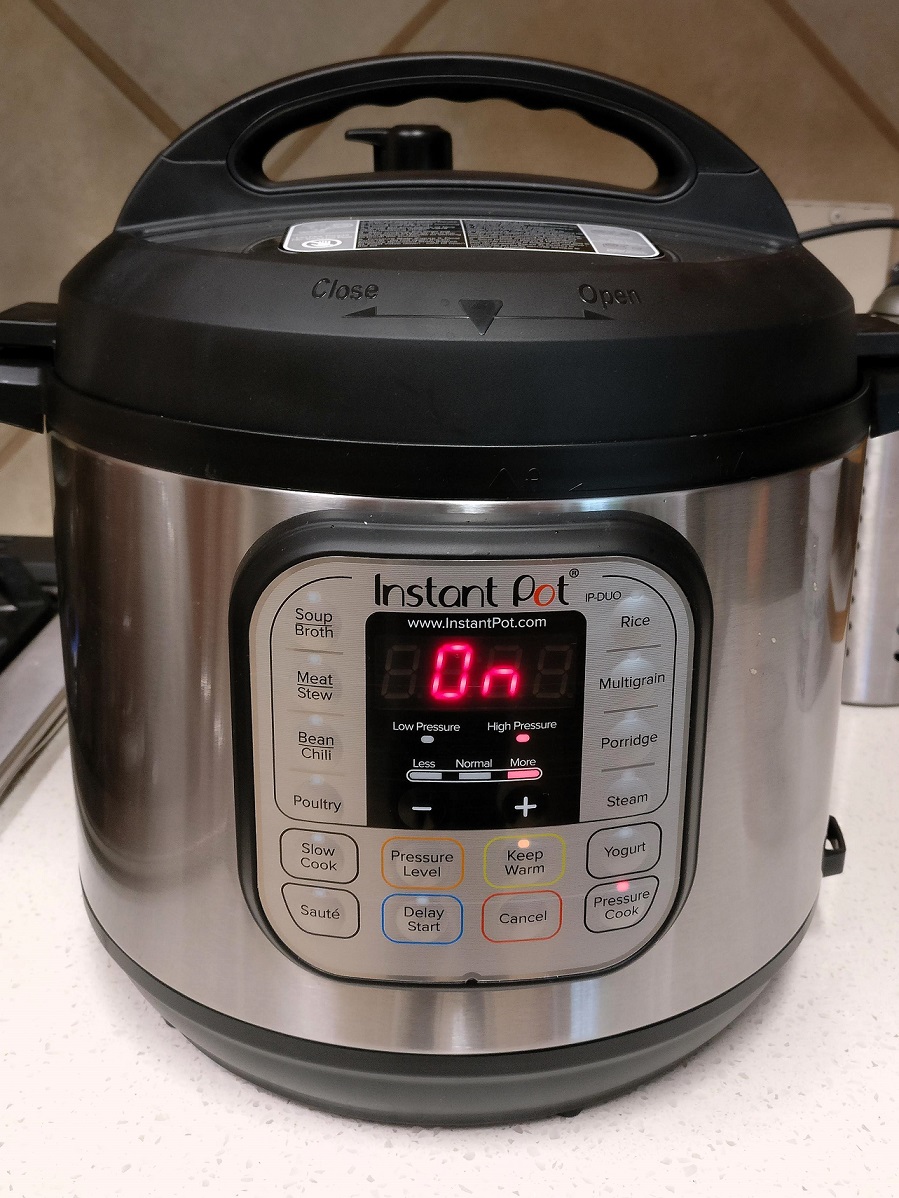
The Poultry setting is one of the dedicated preset buttons found on many Instant Pot models. Its primary function is to cook chicken or turkey to perfection. While the exact default cook time may vary slightly between different Instant Pot models (e.g., Duo, Ultra, Duo Nova, etc.), the core principle remains the same: it utilizes high pressure to ensure thorough cooking.
Default Settings: On most models, when you press the Poultry button, the Instant Pot typically defaults to a specific cooking time at high pressure. For instance, an older model of the Instant Pot Duo might default to 15 minutes on the “Normal Mode,” while other models might have slightly different default times based on general chicken cooking needs.
“Normal Mode,” “Less Mode,” and “More Mode”: Many Instant Pot presets, including Poultry, offer “Adjust” options (sometimes cycling through “Less,” “Normal,” and “More” by pressing the button multiple times).
- Normal Mode: This is the standard setting, suitable for typical fresh chicken pieces like breasts or thighs. The default time associated with this mode is usually a good starting point for achieving tender, cooked-through poultry.
- Less Mode: This mode typically reduces the default cooking time and might be used for smaller, thinner pieces of chicken, or if you prefer a slightly firmer texture. For instance, some models set “Less Mode” to 5 minutes for poultry, ideal for thinly sliced chicken breast or diced chicken that will be used in a quick stir-fry or salad.
- More Mode: Conversely, “More Mode” increases the default cooking time, making it suitable for larger or tougher cuts of poultry, or if you prefer meat that is literally “fall-off-the-bone” tender. Some models might set this to 30 minutes for poultry, which can be excellent for whole chickens or bone-in pieces that need extra time to become exceptionally soft.
It’s important to understand that on most Instant Pot pressure cooking programs (like Poultry, Meat/Stew), the “Less,” “Normal,” and “More” modes primarily adjust the time the Instant Pot cooks under pressure, rather than the pressure level itself. They almost universally operate at high pressure for these functions. The true beauty of these presets is that they offer a convenient starting point, but you always have the flexibility to manually adjust the cook time using the “+” and “-” buttons to suit your specific recipe and the size of your poultry. This manual adjustment is often where the true mastery of Instant Pot cooking lies.

Instant Pot Essentials
Before we dive into specific poultry preparations, let’s quickly review some fundamental Instant Pot principles that apply to virtually all pressure cooking, ensuring safety and optimal results.
The Inner Pot
Every Instant Pot comes with a removable stainless steel inner pot. This is where all your ingredients go. Always ensure it is clean and properly seated in the Instant Pot housing before you begin cooking. Never attempt to cook directly in the outer housing; this will cause damage, create a mess, and is unsafe. The inner pot is designed for durability, even heat distribution, and is typically dishwasher-safe for easy cleanup. It’s important to note the fill lines; never fill liquid above the MAX PC (Pressure Cooking) line for safe operation.
The Instant Pot Lid
The Instant Pot instant pot lid is a marvel of engineering, designed to create the airtight seal necessary for pressure cooking. Understanding its components and proper handling is paramount for safety and successful cooking. Key components to familiarize yourself with include:
- Sealing Ring: This silicone ring fits around the inside rim of the lid. It’s essential for forming the pressure seal. Always ensure it’s clean, flexible, and properly seated around the metal rack before each use. A stretched, cracked, or improperly installed sealing ring can prevent the Instant Pot from coming to pressure, leading to steam leaks and errors. It’s advisable to have a spare sealing ring, especially if you cook savory and sweet dishes, as they can absorb odors.
- Float Valve: A small metal pin (often silver) located next to the steam release handle. When the Instant Pot is pressurizing, this pin rises and locks into place, indicating that pressure has built inside the pot and the lid is sealed. It drops back down when pressure is released, signaling that it’s safe to open the lid. Never attempt to force open the lid if the float valve is still in the raised position.
- Steam Release Handle/Valve: This is the black or red knob/lever on top of the lid. It controls the release of steam. You typically turn or push it to the “Sealing” position for pressure cooking, which closes the vent and allows pressure to build. For releasing pressure, you turn it to “Venting” for a quick release of pressure. Always exercise caution when performing a quick release, as a vigorous stream of hot steam will emanate from the valve.
The All-Important Liquid Requirement
For any pressure cooking function, including the Poultry setting, you must add liquid to the inner pot. Without sufficient liquid, the Instant Pot cannot build pressure, and you’ll likely encounter a “Burn” error, which is a safety mechanism designed to prevent scorching.
The “Cup of Liquid” Rule: As a general rule of thumb, a 6-quart instant pot model requires at least 1 cup of liquid for pressure cooking. Larger models (8-quart or 10-quart) may require 1.5 to 2 cups. This liquid creates the steam needed to build and maintain the necessary pressure level. Common choices include chicken broth (for added flavor) or plain cold water.
Using cold liquid may slightly increase the time it takes for the Instant Pot to come to pressure (as it needs to heat the water to boiling point first), but it typically doesn’t impact the overall quality of the cooked food. For best results, ensure the liquid is at room temperature or colder to prevent premature steam release during pressurization.
Step-by-Step Poultry Cooking with the Instant Pot
Here’s how to achieve perfectly cooked poultry using your Instant Pot, whether it’s individual pieces or a whole chicken.
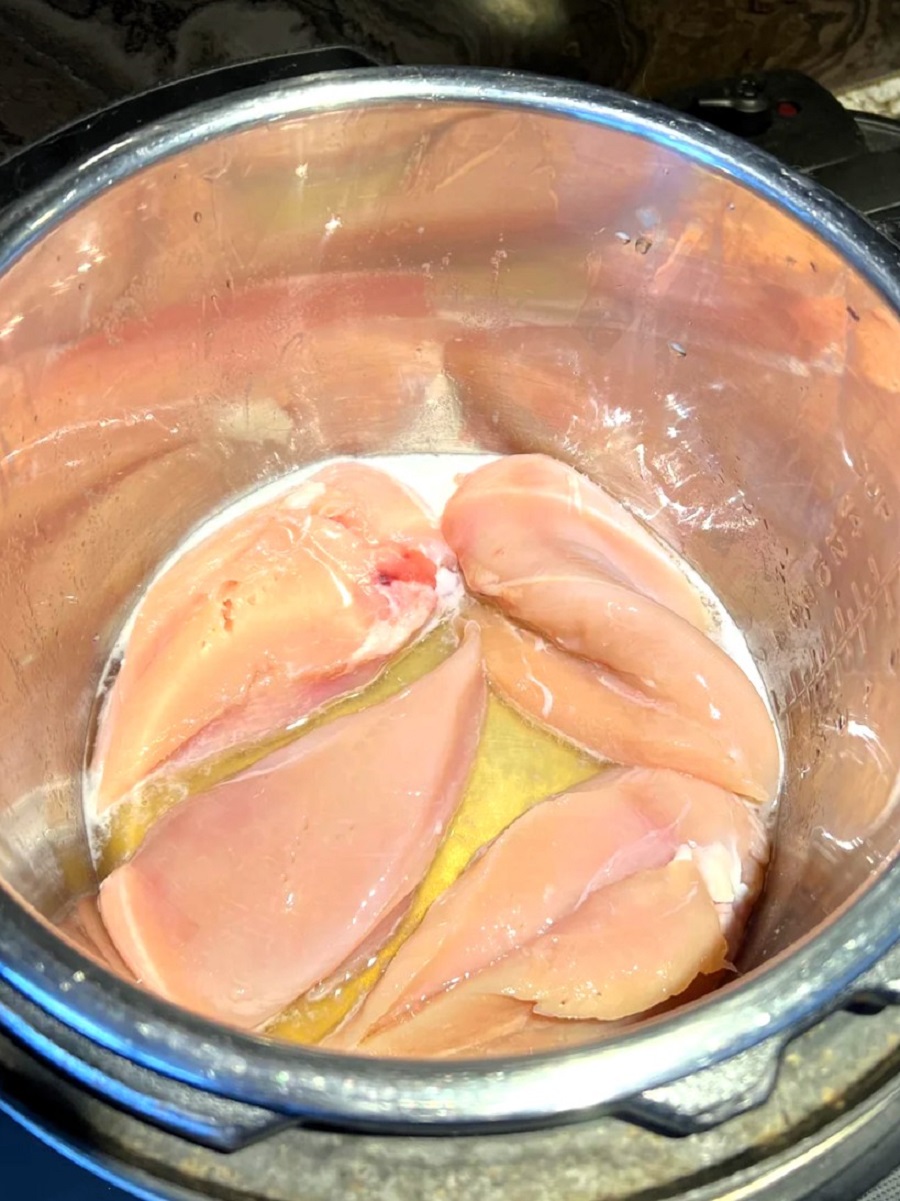
Cooking Boneless, Skinless Chicken Breast
For perfectly tender, shreddable chicken breast ideal for salads, sandwiches, or meal prep, follow these steps:
Prepare the Chicken (Optional Sauté): For extra flavor, you can use the “Sauté” function on your Instant Pot to lightly brown the chicken breasts on all sides before pressure cooking. Add a tablespoon of cooking oil (like olive oil or avocado oil) to the inner pot, press “Sauté,” wait for the display to indicate “Hot,” then brown the chicken for 2-3 minutes per side until lightly golden. Press “Cancel” when done, and if there are any browned bits stuck to the bottom of the pot, deglaze with a splash of your liquid to prevent a “Burn” notice. If not browning, proceed directly to the next step.
Add Liquid: Pour at least 1 cup of liquid (chicken broth or beer for flavor, water for neutrality) into the inner pot.
Place Chicken on Steam Rack: Position the steam rack (trivet, often included with your Instant Pot) at the bottom of the inner pot. Place the chicken pieces on the steam rack in a single layer if possible, or stack them loosely to allow for even steam circulation.
Season: Season the chicken generously with salt, black pepper, and any other desired seasonings (such as garlic powder, onion powder, paprika, dried herbs).
Secure the Lid and Vent: Place the instant pot lid onto the base, aligning the arrows, and twist clockwise until it locks into place. Ensure the steam release handle is turned to the “Sealing” position.
Select Poultry Setting and Time: Press the Poultry button on your Instant Pot.
| Chicken Type | Condition | Recommended Cook Time (High Pressure) | Notes |
|---|---|---|---|
| Boneless, Skinless Chicken Breast (Average Size) | Fresh | 8-10 minutes | For tender, shreddable chicken. |
| Boneless, Skinless Chicken Breast | Frozen (Whole, not separated) | 12-15 minutes | Adjust based on thickness. |
| Thinly Sliced or Diced Chicken Breast | Fresh or Frozen | 5-6 minutes | For a slightly firmer texture; use “Less Mode” if available. |
Begin Cooking: The Instant Pot will display “On” or “Heat,” then “Pressu” as it builds pressure. Once the pressure level is reached and the float valve rises, the cooking time countdown will begin.
Pressure Release: Once the cooking time is complete, the Instant Pot will switch to “Keep Warm.” For chicken breast, a quick release is often preferred to prevent overcooking. Carefully turn the steam release handle to “Venting,” being cautious of the hot steam. Alternatively, allow a natural release for 5-10 minutes, then quick release any remaining pressure; this can result in slightly more tender chicken as it rests in the residual heat.
Check Doneness: Always verify the internal temperature of your cooked chicken with an instant-read thermometer. It should reach 165°F (74°C) at its thickest part.
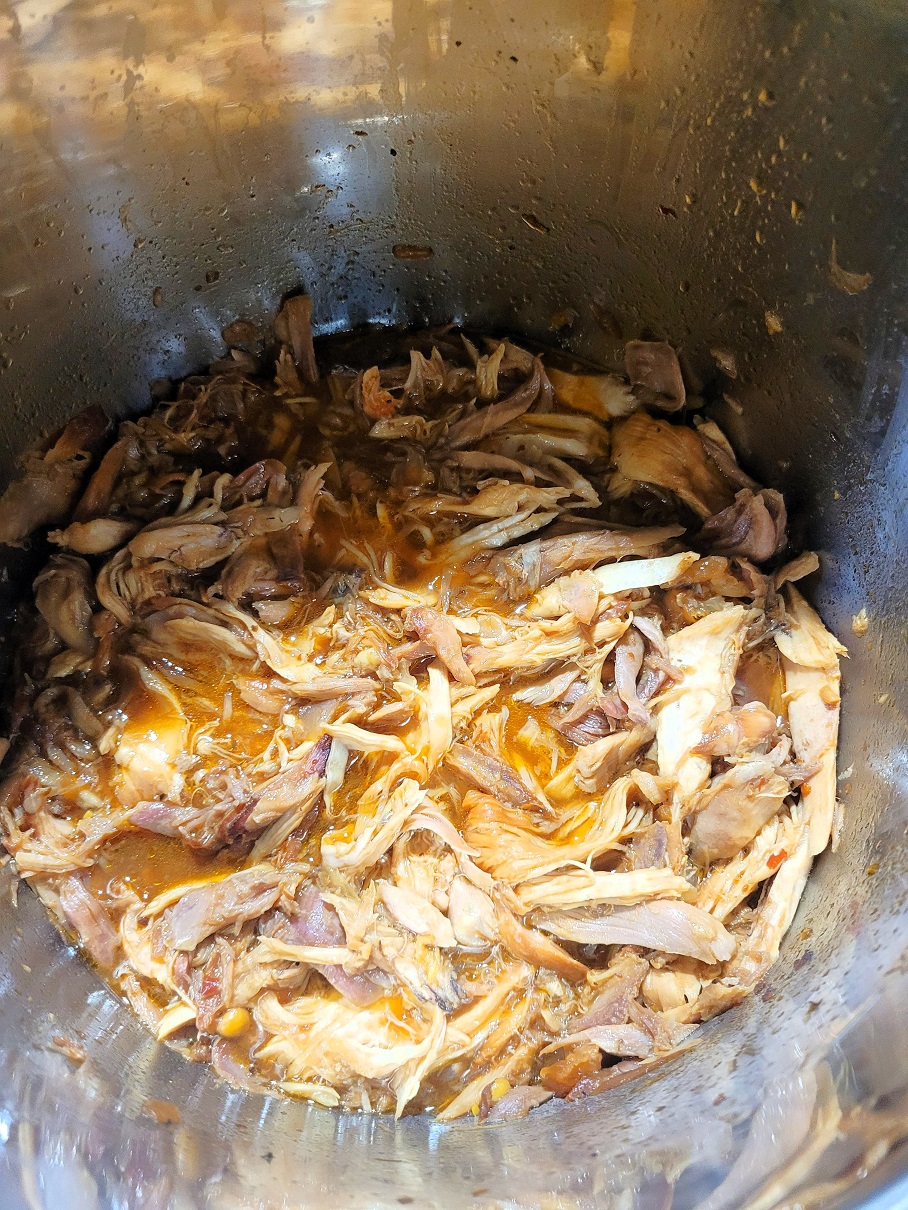
Serve: Remove the chicken. It will be incredibly tender and easy to shred with two forks, or slice as desired.
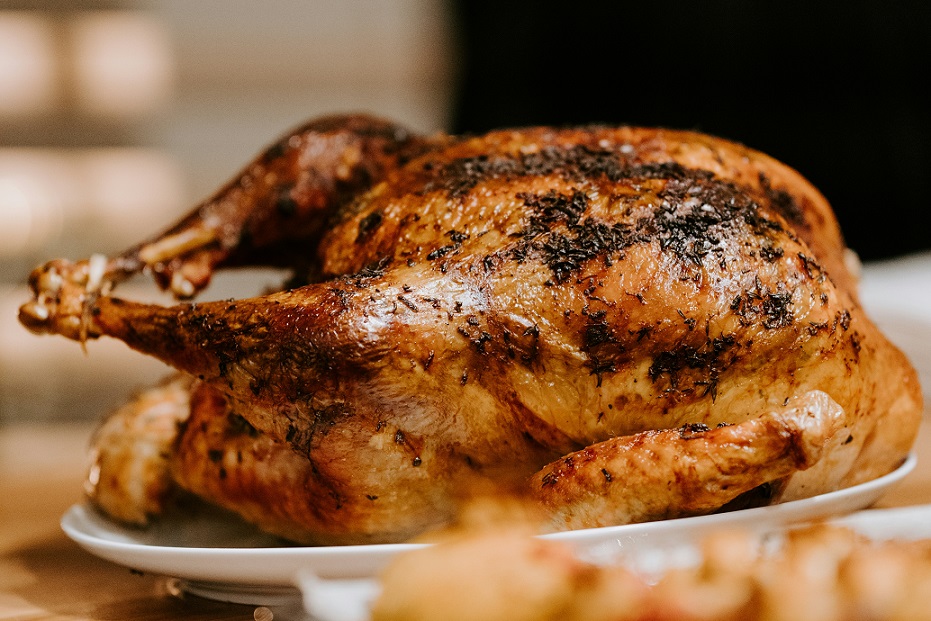
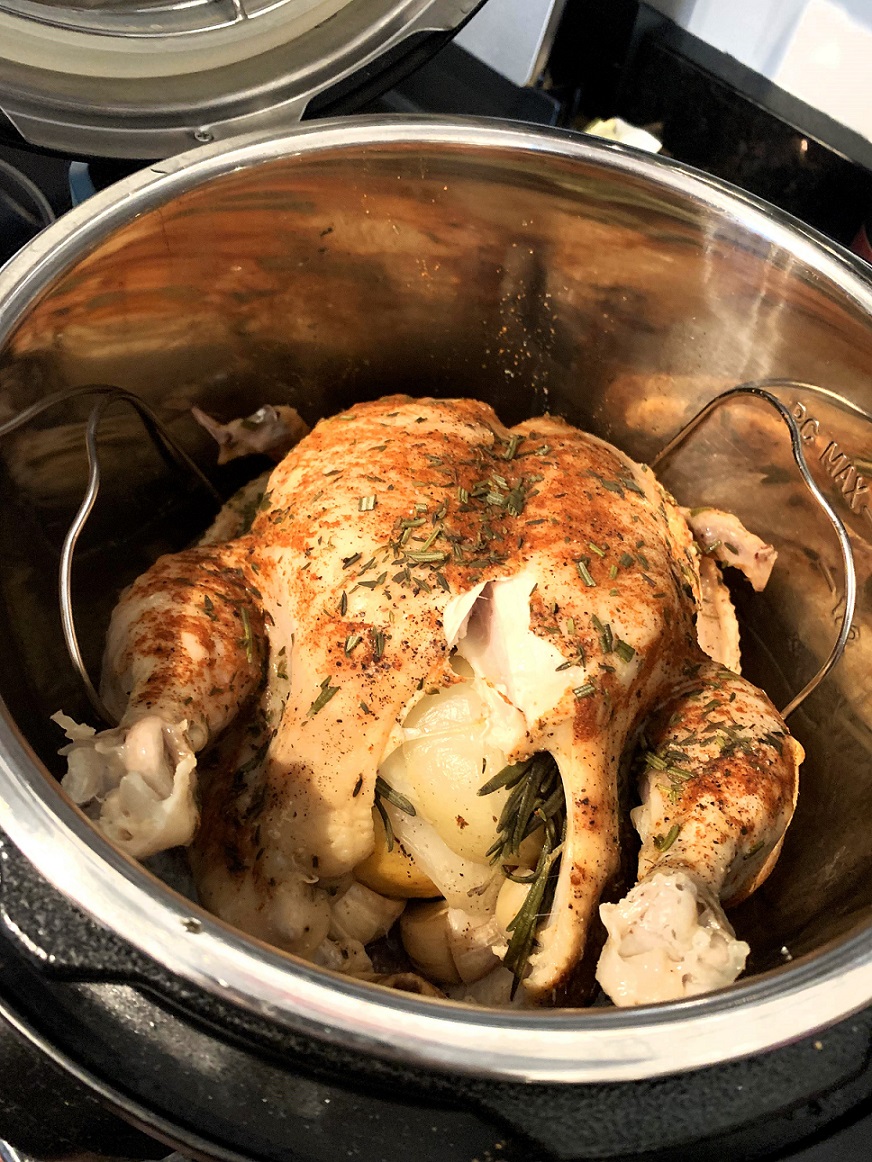
Cooking a Whole Chicken
The Poultry setting can also cook a tender, flavorful whole chicken in a fraction of oven time:
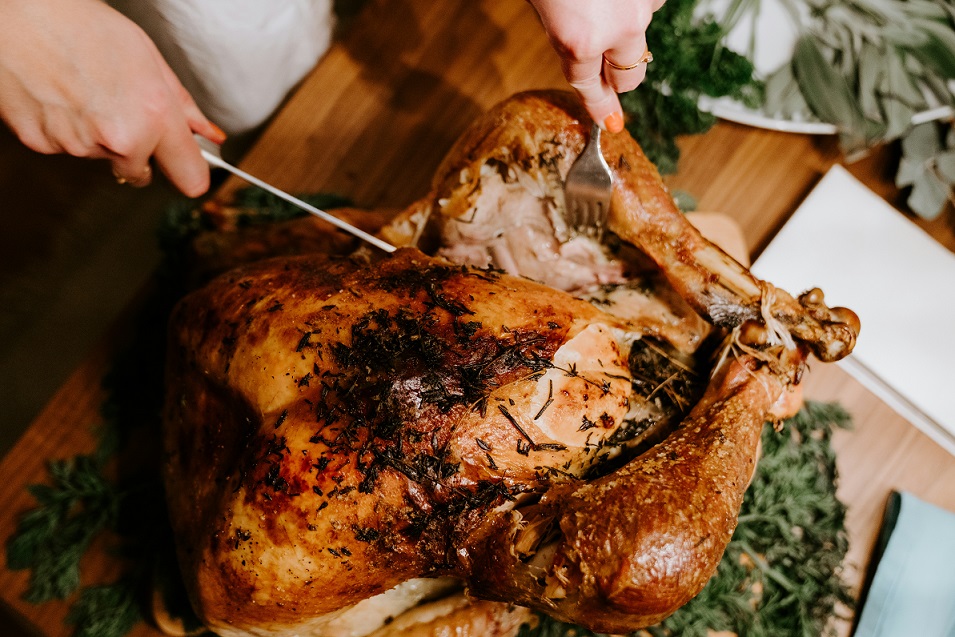
Prepare the Whole Chicken: Remove giblets and neck from the chicken cavity. Pat the chicken thoroughly dry with paper towels. Season generously inside and out with salt, black pepper, and your preferred herbs or poultry rub. You can stuff the cavity with aromatics like half a lemon, a quartered onion, or garlic cloves.
Searing (Optional but Recommended): For a crispier skin and richer flavor, use the “Sauté” function (on “More” mode) to brown the whole chicken on all sides in a tablespoon of oil before pressure cooking. Press “Cancel” when browning is complete.
Add Liquid & Steam Rack: Place the steam rack in the inner pot and add 1-1.5 cup of liquid (chicken broth is ideal). Place the seasoned whole chicken on the steam rack, typically breast-side up, ensuring it fits comfortably without touching the lid.
Secure the Lid and Vent: Place and lock the instant pot lid, ensuring the steam release handle is set to “Sealing.”
Select Poultry Setting and Time: Press the Poultry button.
| Chicken Weight | Condition | Recommended Cook Time (High Pressure) | Notes |
|---|---|---|---|
| 3-pound Whole Chicken | Fresh | 18-24 minutes | Calculated at 6-8 minutes per pound. |
| 4-pound Whole Chicken | Fresh | 24-32 minutes | Calculated at 6-8 minutes per pound. |
| 5-pound Whole Chicken | Fresh | 30-40 minutes | Calculated at 6-8 minutes per pound. |
| Whole Chicken (Any Weight) | Partially Frozen | Add 5-10 minutes to fresh cook time | Adjust based on how frozen the chicken is. |
Begin Cooking: The Instant Pot will begin to build pressure, then start the cooking time countdown.
Pressure Release: For a whole chicken, a natural release of pressure for at least 10-15 minutes (or even a full natural release) is highly recommended. This allows the meat to rest and reabsorb juices, resulting in a more tender and moist bird. After this period, if the float valve is still up, carefully perform a quick release for any remaining pressure.
Crispy Skin (Optional Post-Cooking): If you desire crispy skin (pressure cooking doesn’t crisp skin), transfer the cooked whole chicken to a baking sheet. Broil it in a preheated oven (set to high broil) for 5-10 minutes, or until the skin is golden brown and crispy. Keep a close eye on it to prevent burning.
Serve: Let the chicken rest for a few minutes before carving or serving.
What if Your Instant Pot Doesn’t Have a Poultry Button?
Many Instant Pot users might find that their particular Instant Pot model, especially an older model or a more basic version (like some Lux series or smaller minis), doesn’t feature a dedicated Poultry button. Don’t worry! This is not a limitation at all. The magic of the Instant Pot lies in its underlying pressure cooking function, which you can always control manually.
The “Manual” or “Pressure Cook” button is the workhorse of your Instant Pot, allowing you to set the cooking time and pressure level precisely. This means you have full control, just like the preset buttons, but you choose the duration yourself. Think of the presets as convenient shortcuts; the “Manual” button is the direct route.
Here’s how to cook poultry if you don’t have a specific Poultry preset:
Prepare Ingredients as Usual: Follow all the preparation steps for your chicken breast pieces or whole chicken as outlined above (optional sautéing, adding seasoning, placing on the steam rack). This foundation remains consistent regardless of the button you use.
Add Your Liquid: This step is absolutely non-negotiable for pressure cooking. Ensure you add at least 1 cup of liquid (broth or cold water) to the inner pot. Remember the liquid needs to be sufficient to build steam, but doesn’t necessarily need to submerge the food entirely, especially if using a steam rack.
Secure the Instant Pot Lid and Vent: Place the instant pot lid on your Instant Pot base and turn it to lock securely. Always ensure the steam release handle is set to the “Sealing” position. This is the most crucial step for building pressure.
Select “Pressure Cook” or “Manual”: Press the “Pressure Cook” button (often labeled “Manual” on older models). This is your primary pressure cooking function, and it’s what all the preset buttons ultimately utilize behind the scenes.
Choose Pressure Level (High Pressure): Most savory meat dishes, especially poultry, benefit from high pressure. If your model allows you to toggle between “High Pressure” and “Low Pressure” after pressing “Pressure Cook” (usually by pressing a “Pressure Level” button), ensure “High Pressure” is selected. If your model doesn’t offer a pressure level selection for this button, it typically defaults to High, which is exactly what we want for tender poultry.
Set the Cooking Time: This is where you’ll input the time that the Poultry button would have set for you. Refer back to the times outlined in the previous sections for both chicken breast and whole chicken.
| Chicken Type | Condition | Recommended Cook Time (High Pressure) | Notes |
|---|---|---|---|
| Boneless, Skinless Chicken Breast (Average Size) | Fresh | 8-10 minutes | For tender, shreddable results. |
| Boneless, Skinless Chicken Breast | Frozen (Whole, not separated) | 12-15 minutes | Adjust based on thickness. |
| Thinly Sliced or Diced Chicken Breast | Fresh or Frozen | 5-6 minutes | For a slightly firmer texture. |
| Whole Chicken (per pound) | Fresh | 6-8 minutes per pound | e.g., 3lb: 18-24 min; 4lb: 24-32 min; 5lb: 30-40 min. |
| Whole Chicken (Any Weight) | Partially Frozen | Add 5-10 minutes to fresh cook time | Adjust based on how frozen the chicken is. |
Begin Cooking: The Instant Pot will display “On” and then begin to build pressure. You’ll hear some bubbling and sizzling as it heats up. Once the correct pressure level is reached and the float valve rises (locking the lid), the cooking time countdown will begin.
Pressure Release: Once the cook time is up, the Instant Pot will beep and switch to “Keep Warm.” For chicken breast, a quick release is generally recommended to stop the cooking process quickly. For a whole chicken, a natural release of 10-15 minutes (or full natural release) is preferred for juicier, more relaxed meat. Always ensure the float valve has dropped completely before attempting to open the lid.
Check Doneness: Use a reliable meat thermometer to ensure the poultry has reached an internal temperature of 165°F (74°C). This is the most important step for food safety and quality.
Why this Method Works if You Don’t Have the Poultry Function?
The preset buttons on an Instant Pot are essentially smart shortcuts. They simply pre-program the pressure level (almost always high for meat functions) and a default cooking time. By using the “Manual” or “Pressure Cook” button, you are directly telling the Instant Pot to do the same thing, just with you inputting the specific duration. This gives you ultimate control and allows you to cook any poultry dish with confidence, regardless of whether your Instant Pot model boasts the specific Poultry button. It highlights that the versatility of the Instant Pot lies in its core functionality, not just its myriad of different settings.
Instant Pot Troubleshooting & Tips for Success
Even with the intuitive poultry button or manual settings, it’s good to be aware of a few common scenarios and tips to ensure consistent success.
“Burn” Notice: This error occurs when there’s not enough thin liquid in the inner pot, or if very thick sauces or solid food (like pasta or dense sauces at the bottom) are sticking and preventing proper pressure buildup. Always ensure you have the minimum cup of liquid required for pressure cooking (usually 1 cup for 6-quart models). If cooking with thick sauces or tomato-based ingredients, layer them on top of other ingredients and avoid stirring them into the liquid at the bottom to prevent scorching. Deglaze the pot thoroughly after any sautéing.
Undercooked Poultry: If your chicken isn’t quite done to the safe internal temperature of 165°F (74°C), simply reseal the instant pot lid and cook for an additional 2-5 minutes at high pressure. Use a quick release after this shorter cook time and re-check the temperature. It’s always better to undercook slightly and add more time than to overcook.
Overcooked Poultry: Unfortunately, once meat is significantly overcooked, it’s hard to reverse its dry, stringy texture. This is why precise cooking time and carefully managing the pressure release method (especially for delicate items like chicken breast) are key. Always start with the lower end of recommended times and add more if needed. A full quick release for chicken breast generally yields more control over tenderness compared to a full natural release, which continues to cook the meat.
What are Some Tips For Making the Juiciest Chicken in the Instant Pot?
Don’t overcrowd the pot. While Instant Pots are generous, cooking too much poultry at once can lead to uneven cooking. Cook in batches if necessary.
Use the steam rack (trivet) to keep chicken elevated out of direct liquid contact. This promotes steaming, which is gentler and prevents the meat from becoming waterlogged or boiling.
Consider a partial natural release (5-10 minutes) instead of an immediate quick release for slightly more forgiving results, especially for larger pieces or whole chicken. This allows the internal temperature to equalize and juices to redistribute.
Let the chicken rest for a few minutes after cooking and before shredding or slicing. This is crucial for retaining maximum juiciness.
Frozen Poultry: While the Instant Pot handles frozen poultry, it’s always best if pieces are separated. If cooking a large, frozen block of chicken breast, increase the cooking time by at least 50% to allow for proper thawing and cooking.
The Instant Pot’s Poultry button is far more than just a convenience; it’s a gateway to effortlessly creating succulent, flavorful chicken and turkey dishes. By understanding its default settings, and knowing how to adjust the cook time and utilize different settings like the “Less Mode” or “More Mode” (or the “Manual” button if your Instant Pot model lacks a specific poultry button), you gain precise control over your cooking.
From juicy chicken breast for weeknight meals to a tender whole chicken for family dinners, the Instant Pot streamlines the process, delivering consistent, high-quality results. It’s an investment in efficiency and deliciousness, simplifying what were once complex cooking tasks.
So, next time you’re planning a meal, don’t hesitate to press that Poultry button, or confidently use your “Manual” setting. Experiment, explore, and enjoy the culinary freedom your Instant Pot model provides. Happy cooking!


Thank you very much for the details instruction – very useful.