Last Updated on June 2, 2025 by Karen
Learn how to cook Costco St. Louis-style pork ribs using the 3-2-1 method for tender, juicy results. This foolproof smoking technique will give you flavorful, fall-off-the-bone ribs with minimal effort.
Cooking St. Louis-style pork ribs can be a bit intimidating at first, but using the 3-2-1 method makes it easy to get tender, juicy ribs with a delicious flavor every time. If you’ve picked up a rack of Costco seasoned St. Louis ribs, you’re in for a treat! It’s a great option for those who want high-quality, flavorful ribs without the hassle of preparing the seasoning themselves. They’re convenient, consistent, and offer a delicious flavor profile that works for most BBQ enthusiasts. Whether you’re new to grilling or just looking for a quick meal, these pre-seasoned ribs take the stress out of meal prep and deliver tender, juicy results.
Today, I’m sharing this 3-2-1 method of cooking the Costco preseasoned St. Louis-style pork ribs in the smoker. It involves slow cooking the ribs in three stages: smoking, wrapping, and finishing off with high heat. The result is tender, flavorful, and fall-off-the-bone ribs, perfect for your next BBQ feast. Whether you’re cooking them on a Traeger grill or a Weber kettle smoker, we’ve got you covered.

Why use Costco preseasoned St. Louis-style pork ribs?
Using pre-seasoned Costco St. Louis-style ribs offers several benefits that make them an attractive choice for both novice and experienced cooks alike. Here are some key reasons why you might want to opt for pre-seasoned ribs from Costco:
1. Convenience and Time-Saving
Pre-seasoned ribs come ready to cook, so you don’t have to spend time preparing the dry rub or marinating the meat. This can save you a lot of time, especially if you’re in a rush or just want a quick, easy dinner. Simply pick up the ribs, throw them on the grill or smoker, and you’re good to go!
2. Consistent Flavor
Costco’s pre-seasoned St. Louis-style ribs are typically made with a balanced blend of spices, brown sugar, and other seasonings. This ensures a consistent, flavorful result every time, even if you’re new to cooking ribs. You don’t have to worry about over-seasoning or under-seasoning, which can happen if you’re still learning the art of dry rubs.
3. Perfect for Beginners
If you’re new to grilling or smoking ribs, using pre-seasoned ribs takes some of the guesswork out of the equation. The seasoning is already applied, so you can focus on getting your cooking technique just right, whether you’re smoking them low and slow or grilling them over direct heat.
4. Flavor Profile
Costco’s pre-seasoned ribs are designed to have a balanced flavor profile. The seasoning blend often includes a mix of savory spices, brown sugar for sweetness, and a bit of heat. This makes them ideal for people who enjoy a well-rounded, classic BBQ flavor without needing to experiment with different spices and seasonings.
5. Great for Busy Days
If you’re short on time or don’t feel like putting together a custom rub, pre-seasoned ribs are an excellent choice. You can get them right out of the package and onto the grill or smoker, making them a great option for weeknight dinners, weekend BBQs, or when you’re hosting a last-minute gathering.
6. Quality Meat
Costco is known for offering high-quality meat, and their pre-seasoned St. Louis-style ribs are no exception. The meat is typically tender and flavorful, ensuring a great meal even with minimal effort.
7. Perfect for Experimenting
While the seasoning on the pre-seasoned ribs is already great on its own, you can also customize them if you like. For example, you could add more BBQ sauce towards the end of cooking for extra flavor, or add a different spice rub to enhance the existing seasoning.
8. Consistency in Cooking
Because the seasoning is applied evenly, you can expect a consistent taste throughout the rack of ribs. This makes it easier to get perfectly flavored ribs without worrying about whether some pieces are under-seasoned or over-seasoned.
Why is the 3-2-1 method good for these preseasoned ribs?
The 3-2-1 method is ideal for cooking Costco’s pre-seasoned St. Louis-style ribs because it ensures the meat becomes tender, juicy, and full of flavor. By smoking the ribs for 3 hours over indirect heat, the connective tissue breaks down slowly, making the ribs tender while allowing the seasoning to set in without burning.
The second step, wrapping the ribs in aluminum foil for 2 hours, keeps them moist and helps the rub caramelize without drying out. The final hour of direct heat allows the ribs to develop a crispy, flavorful outer layer and enhances the caramelization of the sugars in the seasoning, giving the ribs that signature BBQ texture. This method complements the pre-seasoned flavors perfectly, making it easy to achieve melt-in-your-mouth tenderness and smoky flavor with minimal effort.
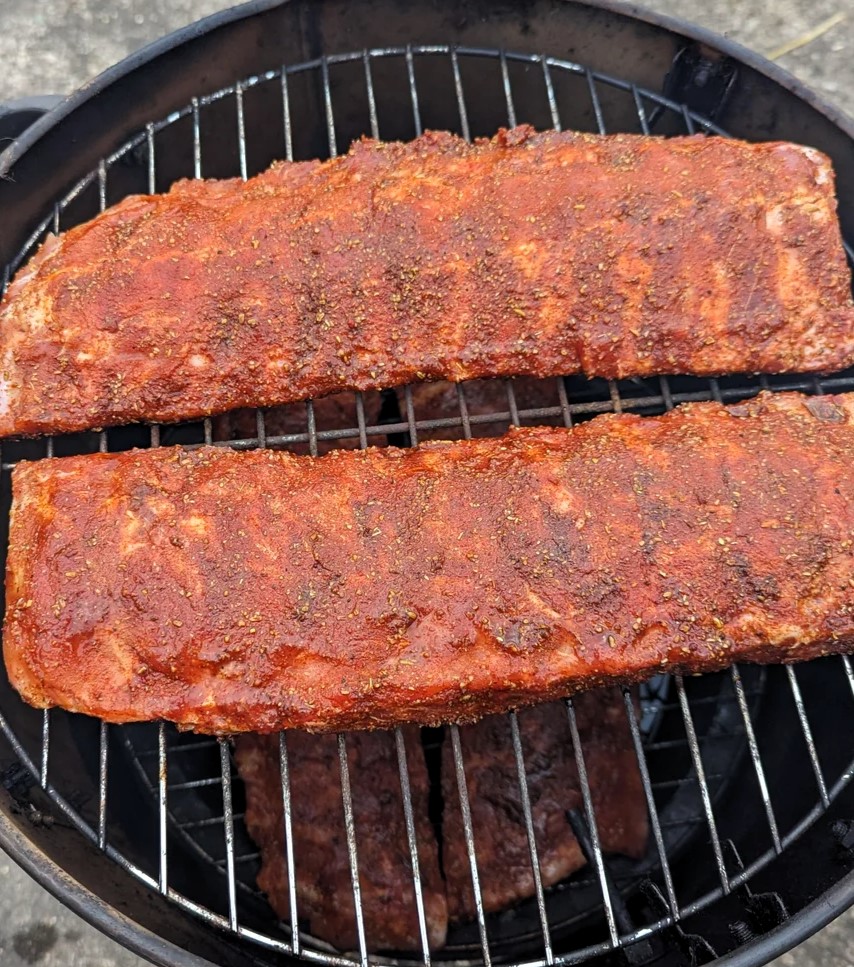
Step 1: Smoke the ribs for 3 hours
The first step in the 3-2-1 method is smoking your ribs for about 3 hours. This allows the meat to soak up all the smoky goodness from the wood chips while the seasoning really starts to work its magic. Here’s what you’ll need to get started:
What You’ll Need:
Costco St. Louis-style ribs (or spare ribs)
Your favorite dry rub (this could include brown sugar, onion powder, and other spices)
Wood chips (apple wood works great, but you can use any kind you prefer)
A smoker or grill (like a Traeger grill)
Aluminum foil
A baking sheet to place the ribs on once they’re wrapped
Steps for Smoking:
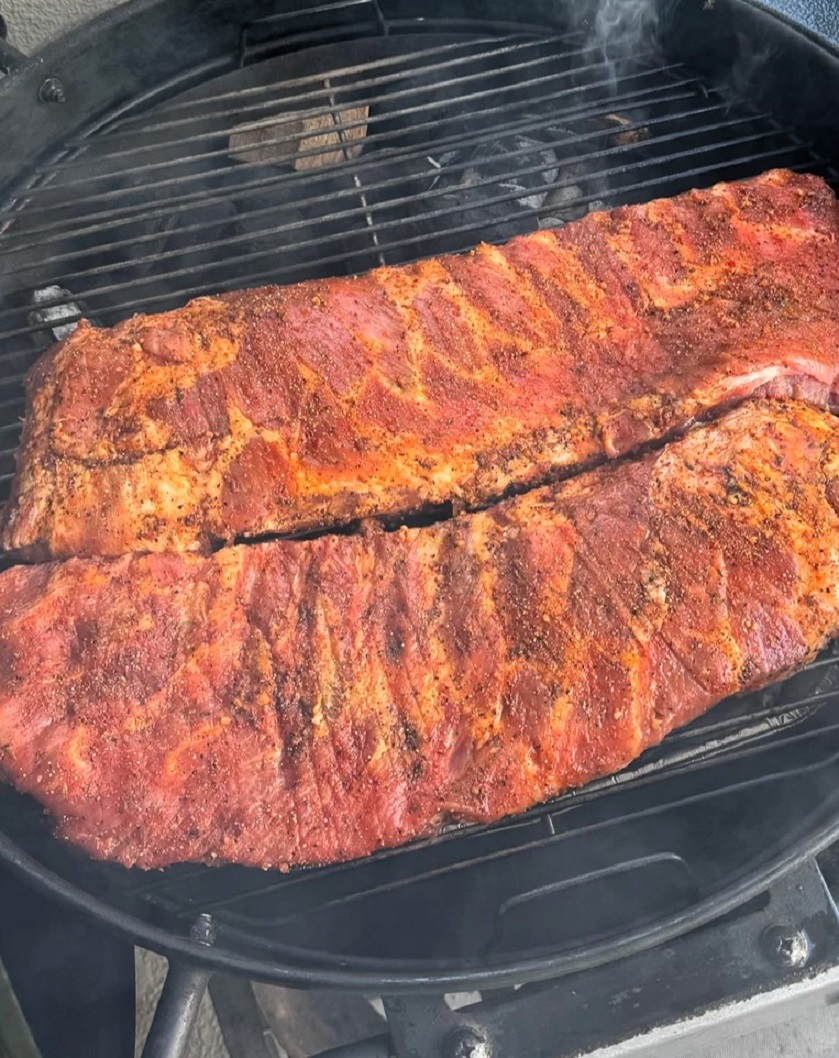
1. Prep the Ribs: Remove the ribs from the package. Use a paper towel to pat them dry. This helps remove any excess moisture, which could prevent the rub from sticking. If you like, you can also remove the silver skin from the back of the ribs (the tough membrane that can make the ribs chewy). For a great flavor, rub the ribs with your favorite dry rub. You can use a blend of brown sugar, onion powder, garlic powder, and a little Worcestershire sauce to add depth.
2. Prepare Your Grill: Set your grill to indirect heat. You’ll want a low temperature for smoking, typically around 225°F to 250°F. If you’re using a Traeger or another pellet smoker, it will be easy to set the right temperature. Add the wood chips to create that nice smoky flavor.
3. Place the Ribs on the Grill: Lay your ribs bone-side down on the grill grate. Make sure to place them in the area of the grill with indirect heat (away from the direct flame). Let them smoke for 3 hours. This will infuse the meat with flavor and start breaking down the connective tissue, making the ribs tender.
Step 2: Wrap the ribs for 2 hours
Once your ribs have smoked for 3 hours, it’s time to wrap them in aluminum foil for the next step. This will help tenderize the ribs even more by trapping in moisture.
What You’ll Need:
Aluminum foil
A spray bottle filled with apple juice or water
Steps for Wrapping:
1. Wrap the Ribs: Carefully remove the ribs from the grill. If you’re using a baking sheet to catch any drippings, you can place the ribs on it now. Tear off a large piece of aluminum foil. Wrap the ribs tightly in the foil, making sure no steam escapes. You can also add a little apple juice to the foil to create steam that will help keep the ribs juicy.
2. Return to the Grill: Place the wrapped ribs back onto the grill, this time on the indirect heat side. Let them cook for another 2 hours. The foil traps moisture, which helps break down the remaining fat and connective tissue, leaving you with tender, juicy ribs.
Step 3: Finish with high heat for 1 hour
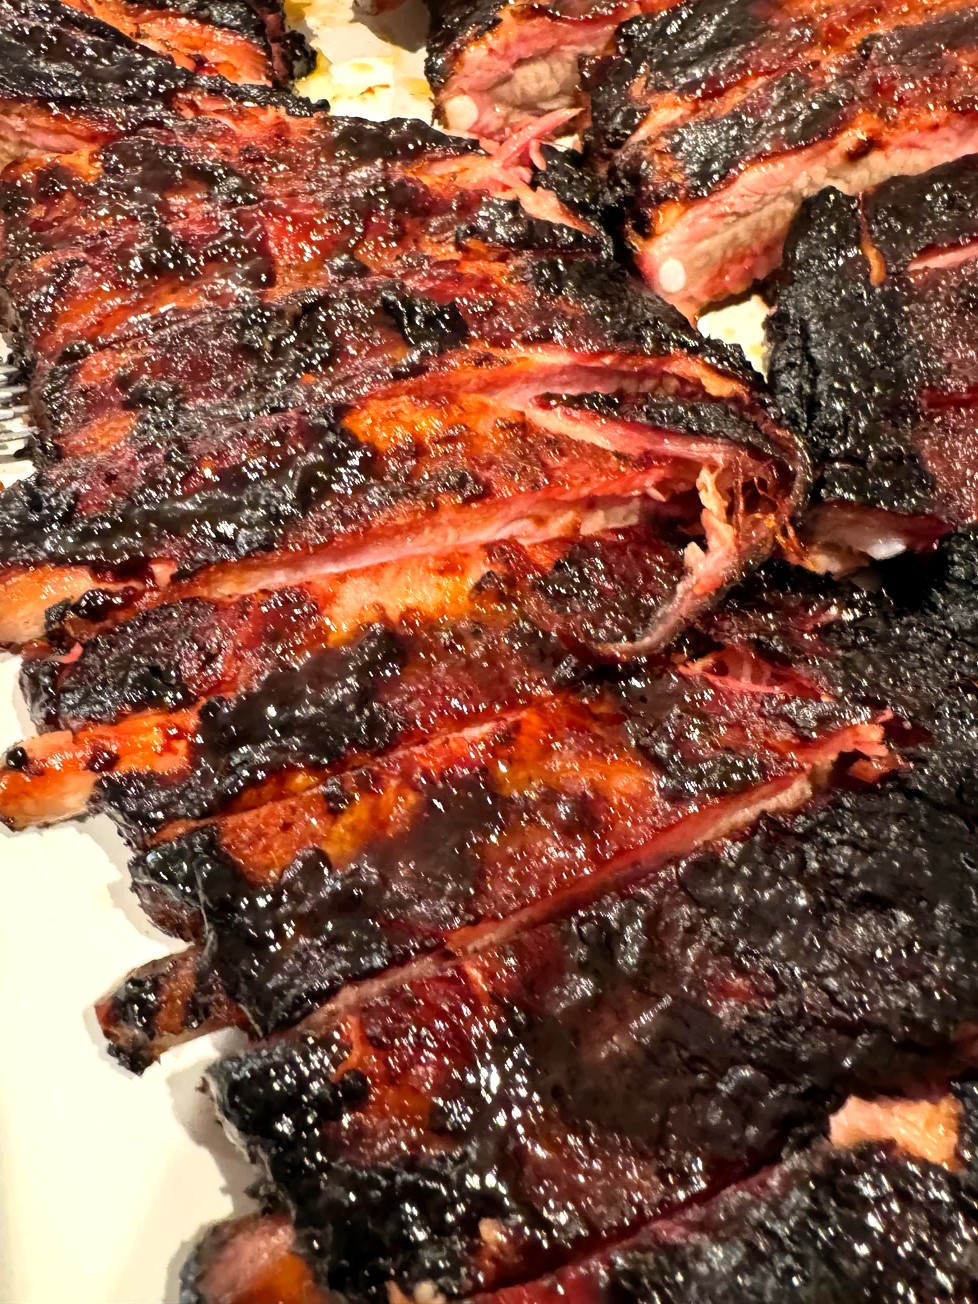
The final step is where the magic happens: finishing the ribs on high heat for about 1 hour. This is the part where you get that perfect caramelization of the BBQ sauce sugars and a nice crispy texture on the outside.
What You’ll Need:
Your favorite BBQ sauce (homemade or store-bought)
A rib rack (optional)
A hot grill or oven
Steps for Finishing:
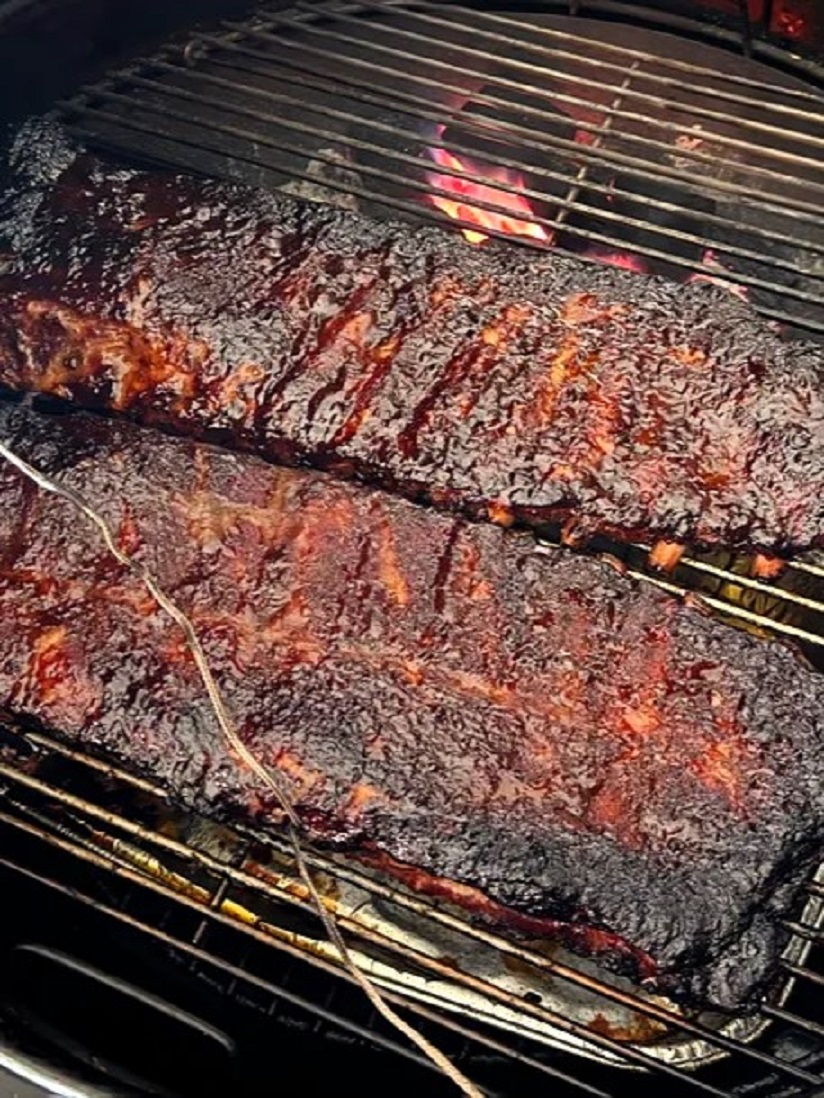
1. Preheat Your Grill: Increase the heat on your grill to about 375°F to 400°F. If you’re using a Traeger or another pellet grill, this will be easy to control. The high heat will help caramelize the BBQ sauce, giving the ribs a nice glaze.
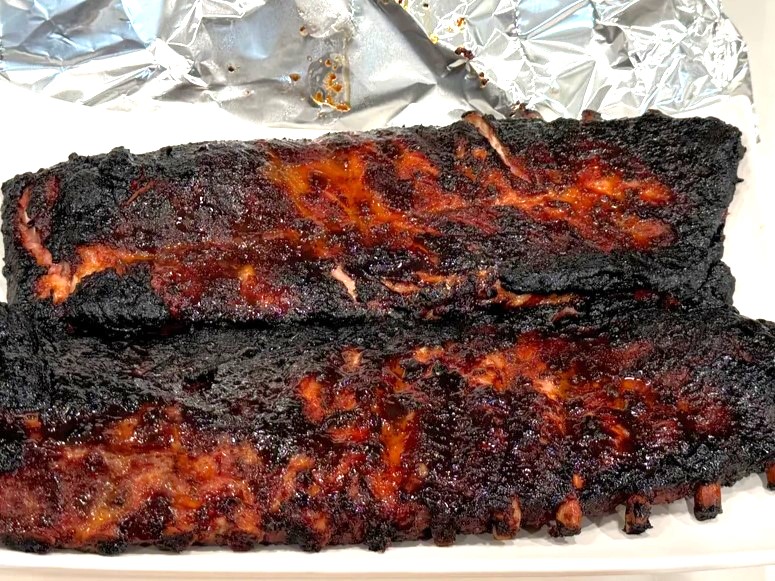
2. Unwrap and Sauce the Ribs: Carefully unwrap the ribs from the foil. Brush both sides of the ribs with a generous amount of your favorite BBQ sauce. If you like, you can add a little extra brown sugar or Worcestershire sauce to your BBQ sauce to enhance the caramelization.
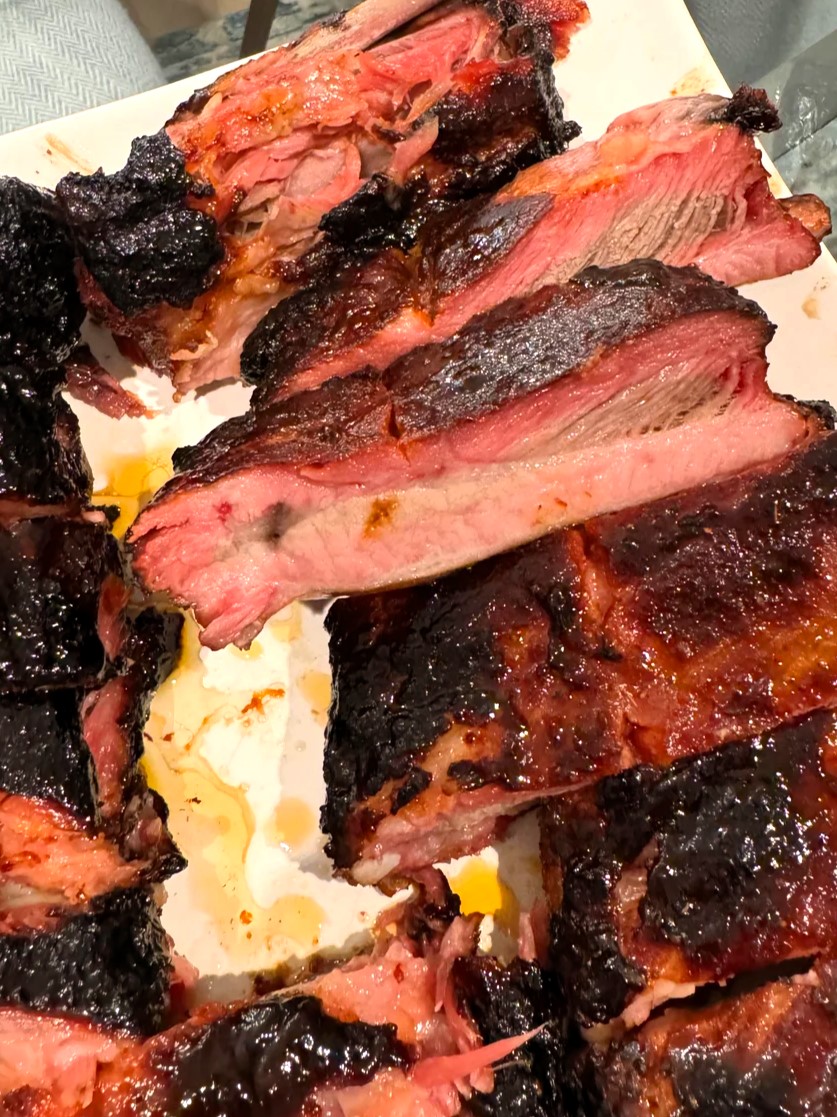
3. Grill for 1 Hour: Place the ribs back on the grill, bone-side down, for about 1 hour. This allows the BBQ sauce to set and caramelize. During this time, you can check the internal temperature of the ribs with a meat thermometer. You’re aiming for an internal temperature of around 190°F for tender, juicy ribs.
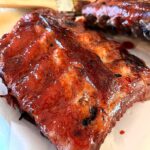
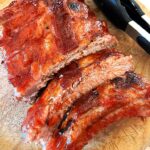
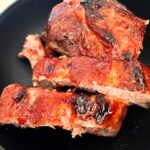
4. Check the Ribs: Once they’re done, you should be able to see a nice glaze on the ribs with perfect grill marks. You’ll know the ribs are ready when they are tender but still firm enough to hold together when you cut them. A good test is to gently twist a bone – it should pull away easily from the meat.
Bonus Tips for Perfect Ribs
Slow Cooking: If you prefer slow-cooked ribs, you can also make slow cooker ribs. Simply cook them on low for about 6-8 hours before finishing them on the grill for the last step to get that crispy caramelization.
Bone-Side of the Ribs: Always place your ribs bone-side down for even cooking.
Check the Internal Temperature: Ribs are done when they reach an internal temperature of around 190°F. This ensures the meat is tender and the collagen has broken down.
Use a Rib Rack: If you’re cooking multiple racks of ribs, a rib rack can help keep the ribs upright and cook them evenly.
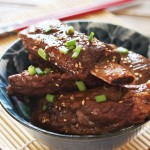
What is the Best Way to Serve Ribs?
Once your St. Louis-style ribs are done, you can serve them up with your favorite sides, like coleslaw, baked beans, or cornbread. A delicious rice bowl works great, too! These ribs also pair perfectly with extra BBQ sauce on the side for dipping.
How Long Should I Cook Costco Ribs on the Grill?
Using the 3-2-1 method, smoke the ribs for 3 hours, wrap them and cook for 2 hours, and then finish with high heat for 1 hour.
What is the Internal Temperature for Perfect Ribs?
The perfect internal temperature for tender, juicy ribs is around 190°F.
Does Costco Ribs Have Membrane?
Whether Costco ribs have the membrane removed can vary depending on the location, product type, and packaging. Some customers find that baby back ribs often come with the membrane (silver skin) already taken off, while others report it still being attached, especially with St. Louis ribs. If you’re unsure, it’s best to check the packaging or ask your local Costco.
Should I Remove the Membrane (Silver Skin) From the Ribs?
Removing the silver skin helps prevent tough, chewy spots on the ribs. This is an individual preference. I personally don’t mind it on, but a lot of people argue that the sauce sticks better on the meat when the silver skin is removed. If you want to remove it for better flavor and tenderness — simply loosen it with a butter knife and pull it off using a paper towel.
Using the 3-2-1 method for cooking Costco St. Louis-style pork ribs is a foolproof way to make delicious, tender ribs every time. Whether you’re smoking them on a Traeger grill, in the oven, or on your favorite BBQ setup, this method guarantees a great result. Add your favorite BBQ sauce and enjoy these juicy ribs that will impress your family and friends at your next cookout!
Good luck with your rib cooking, and don’t forget to share your results on TikTok – we’d love to see how you make these tasty ribs!